Straight line but mine as far as I can reach to the left/right every few blocks. I like it cause I don’t have to collect all the useless blocks and don’t have to walk as much
TheDancingH on
like this:
█████░█████
▒▒▒▒▒░▒▒▒▒▒
█████░█████
▒▒▒▒▒░▒▒▒▒▒
█████░█████
do a regular strip mine, but every other block, mine a one-block hole off to the sides as far as your pick can reach
this covers the most area with the least effort
sijmen_v_b on
I believe it was something like: mine in a straight line while mining the block at eye level to the sides as far as you can reach. Only going in if you find the ore you’re looking for. Do this for every 4 blocks (so leave 3 blocks in between each side tunnel)
Stripmining is all about the number of blocks you can expose in a given time.
You leave gaps of 3 blocks since most ores spawn in pockets so it’s rare you mis a patch in the one block you don’t reveal.
Exact_Leader_1002 on
I like going like this:
| | |
| | | _
MGlBlaze on
Branch mining is pretty straightforward.
If you want to super minmax it, use trapdoors to put your character in to a crawling position for a 1×1 branch to maximize the number of blocks revealed per block mined; 5:1 (the four around the mined block plus the back block) instead of 4:1 (8 in total, six around the mined blocks plus the two back blocks) for a 2×1 mine corridor.
TheOtherGuy52 on
I employ a strategy I call ‘windmill mining.’
Start with a decently large square room at the level you want to mine at. In each corner, dig a 4 block deep tunnel at the very rightmost edge of each wall, and place a torch. Might also help to place cobble in the floor to help mark it.
These are your four starting anchor points.
Each layer of the windmill is made by going to one of the anchor points, digging 4 to the right, and 4 straight. Place a new anchor point, turn around, and dig straight until you hit the anchor point for the next corner clockwise.
You’ll end up digging a spiral-like pattern with zig-zag shortcuts back to the central room, so it’s always a short trek when you’re done with a mining session, and when you wanna resume. The spacing between tunnels is 3 blocks thick, so you won’t see every block, but you *will* see the vast majority of ore nodes given how they generate clumped together.
QuaintLittleCrafter on
Remove all your armor slowly. One piece at a time. Don’t be afraid to bite your pickaxe seductively in the process. Maintain eye contact with the patron. End the show with tnt for extra impact.
At least, that’s how I strip while I mine.
TheEpicPlushGodreal on
Strip mining is less efficient than cave mining with current generation. I haven’t step minded since they changed the caves
JetHawklol998212 on
Who ever does a zigzag is someone cheating😭🙏🏻
A_lexine on
mine for X blocks in one direction.
move 4 blocks (so, 2 between tunnels) to the side and mine another X blocks back.
repeat.
you have now revealed every single block of those 2 Y levels in that entire area and can be 100% confident that that 2 block tall cut of the land is CLEAN of all ores.
Tthehecker on
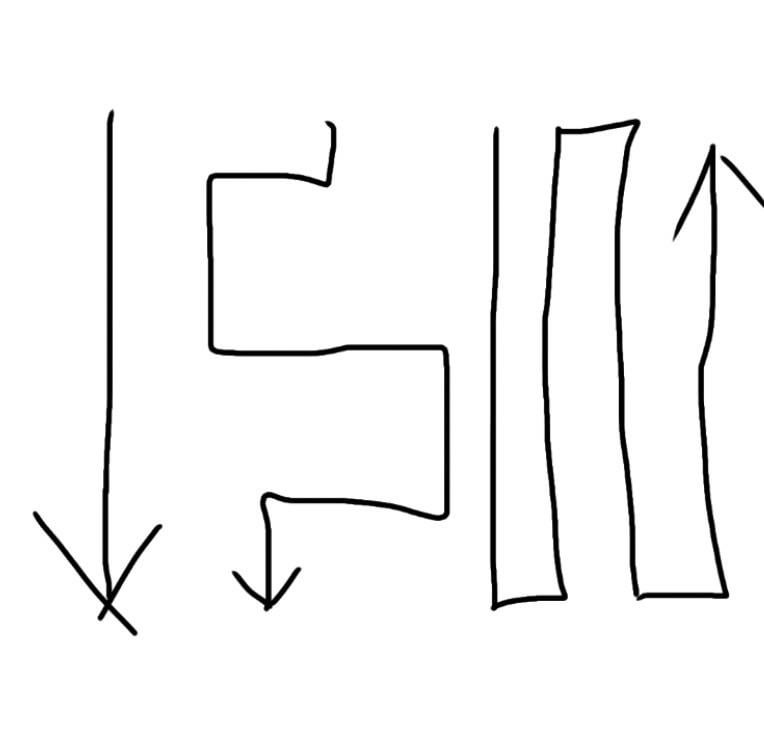
Is it just me or do anyone else see FN
Hunterrcrafter on
I think the most efficient way is to be mining blocks the whole time. Turning around takes away time you could have spent mining blocks.
TekoXVI on
I do poke hole mining
4ewhat on
ribcage mining with 2 block intervals between ribs is my go to
New-Valuable-4757 on
X ray
Key_Lavishness3528 on
I do combos, and sometimes just clear large areas making large rooms at -53. Its just rng really
Wilgrove on
You forgot the 4th option, TNT!
AliceThePastelWitch on
Well, none of these options. The classic straight line with branches every 2 blocks from the previous one is the best.

18 Comments
I like the —|—|—|—
Straight line but mine as far as I can reach to the left/right every few blocks. I like it cause I don’t have to collect all the useless blocks and don’t have to walk as much
like this:
█████░█████
▒▒▒▒▒░▒▒▒▒▒
█████░█████
▒▒▒▒▒░▒▒▒▒▒
█████░█████
do a regular strip mine, but every other block, mine a one-block hole off to the sides as far as your pick can reach
this covers the most area with the least effort
I believe it was something like: mine in a straight line while mining the block at eye level to the sides as far as you can reach. Only going in if you find the ore you’re looking for. Do this for every 4 blocks (so leave 3 blocks in between each side tunnel)
Stripmining is all about the number of blocks you can expose in a given time.
You leave gaps of 3 blocks since most ores spawn in pockets so it’s rare you mis a patch in the one block you don’t reveal.
I like going like this:
| | |
| | | _
Branch mining is pretty straightforward.
If you want to super minmax it, use trapdoors to put your character in to a crawling position for a 1×1 branch to maximize the number of blocks revealed per block mined; 5:1 (the four around the mined block plus the back block) instead of 4:1 (8 in total, six around the mined blocks plus the two back blocks) for a 2×1 mine corridor.
I employ a strategy I call ‘windmill mining.’
Start with a decently large square room at the level you want to mine at. In each corner, dig a 4 block deep tunnel at the very rightmost edge of each wall, and place a torch. Might also help to place cobble in the floor to help mark it.
These are your four starting anchor points.
Each layer of the windmill is made by going to one of the anchor points, digging 4 to the right, and 4 straight. Place a new anchor point, turn around, and dig straight until you hit the anchor point for the next corner clockwise.
You’ll end up digging a spiral-like pattern with zig-zag shortcuts back to the central room, so it’s always a short trek when you’re done with a mining session, and when you wanna resume. The spacing between tunnels is 3 blocks thick, so you won’t see every block, but you *will* see the vast majority of ore nodes given how they generate clumped together.
Remove all your armor slowly. One piece at a time. Don’t be afraid to bite your pickaxe seductively in the process. Maintain eye contact with the patron. End the show with tnt for extra impact.
At least, that’s how I strip while I mine.
Strip mining is less efficient than cave mining with current generation. I haven’t step minded since they changed the caves
Who ever does a zigzag is someone cheating😭🙏🏻
mine for X blocks in one direction.
move 4 blocks (so, 2 between tunnels) to the side and mine another X blocks back.
repeat.
you have now revealed every single block of those 2 Y levels in that entire area and can be 100% confident that that 2 block tall cut of the land is CLEAN of all ores.
Is it just me or do anyone else see FN
I think the most efficient way is to be mining blocks the whole time. Turning around takes away time you could have spent mining blocks.
I do poke hole mining
ribcage mining with 2 block intervals between ribs is my go to
X ray
I do combos, and sometimes just clear large areas making large rooms at -53. Its just rng really
You forgot the 4th option, TNT!
Well, none of these options. The classic straight line with branches every 2 blocks from the previous one is the best.